Uploading Using the XNAT Desktop Client (DXM)
Overview
The XNAT Desktop Client, also known as the Data Transfer Manager (DXM), is a standalone application used to upload and download imaging session data to CNDA (powered by XNAT).
It supports XNAT 1.7.5 and later and is available for:
- Windows
- Mac OS
- Linux
The client is designed to anonymize and securely upload imaging sessions directly to CNDA.
Downloading the Client
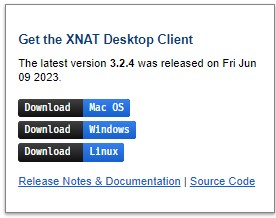
Download the latest version from:
https://download.xnat.org/desktop-client/
Under Get the XNAT Desktop Client, choose the version that matches your operating system.
If you are unsure which version to install, contact your IT department.
Installing the Client
Installation steps vary by operating system.
These instructions will focus on Windows.
You can read the official installation guide here in case needed:
https://wiki.xnat.org/xnat-tools/xnat-desktop-client-dxm/installing-the-xnat-desktop-client
Installing on Windows
The Windows version includes an embedded Java Runtime Environment.
For best results, install on a native Windows system rather than a virtual environment.
Installation Steps
- Download the
.exeinstaller. - Open the installer from your Downloads folder.
- Click Yes if prompted to allow changes.
- Complete the setup wizard.
- Click Finish.
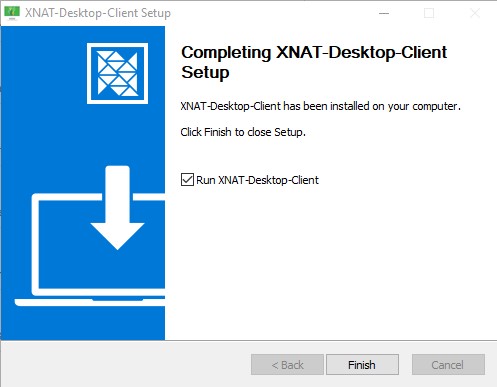
After installation, the client will launch.
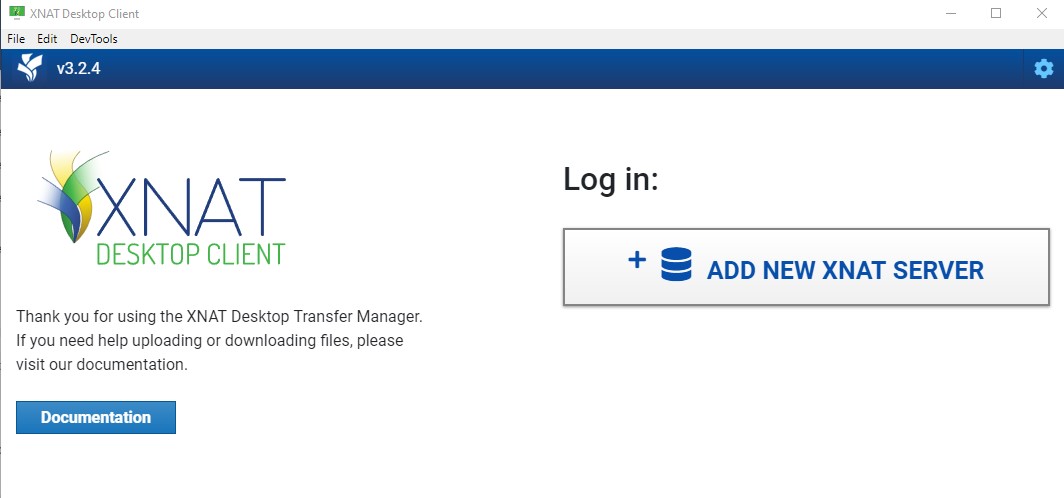
First-Time Setup
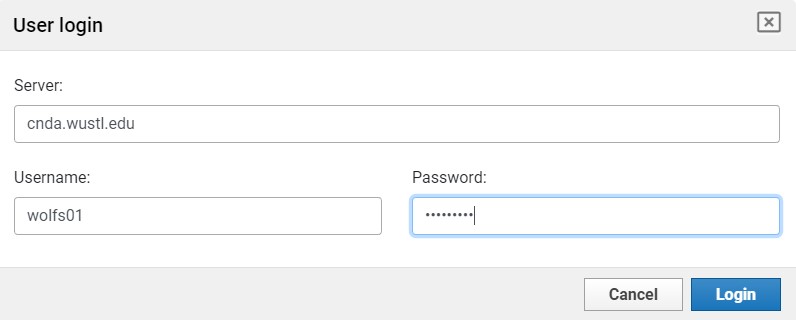
When launching the client for the first time, you must add the CNDA server.
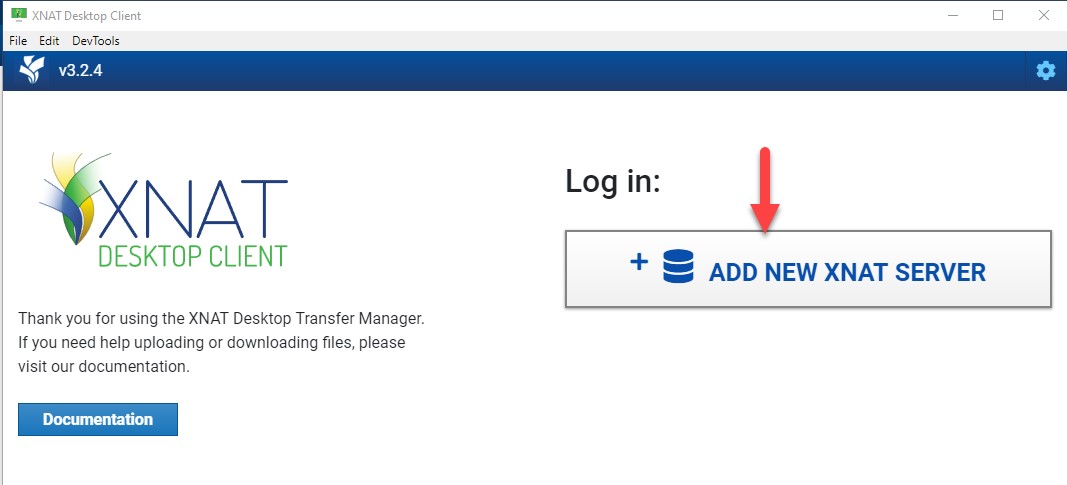
- Click Add New XNAT Server.
Enter the following credentials:
- Server: cnda.wustl.edu
- Username: your CNDA username
- Password: your CNDA password
Note: Server should always be exactly cnda.wustl.edu. In the near future, we are migrating to CNDA2, which has a different login method. See more on that below.
Click Login.
Your connection settings will be saved for future sessions.
COMING SOON: CNDA2
CNDA2 uses WashU Key for authentication, which the Desktop Client does not support directly. You must use an alias token instead of your WashU Key credentials.
Before adding the server, generate an alias token from your CNDA2 account.
- Click Add New XNAT Server.
- Enter the following credentials:
- Server:
cnda2.wustl.edu - Username: your alias token alias
- Password: your alias token secret
- Server:
- Click Login.
Your connection settings will be saved for future sessions.
Recommended Configuration
Run as Administrator (Windows)
For improved stability:
- Right-click the desktop icon
- Select Run as Administrator
If administrator access is not available, continue normally.
Adjust Upload Concurrency
Reducing concurrency can prevent freezing during upload.
- Click the Settings (gear icon) in the top right.
- Select User Settings.
- Locate Upload Concurrency.
- Change the value to
1. - Click Save.
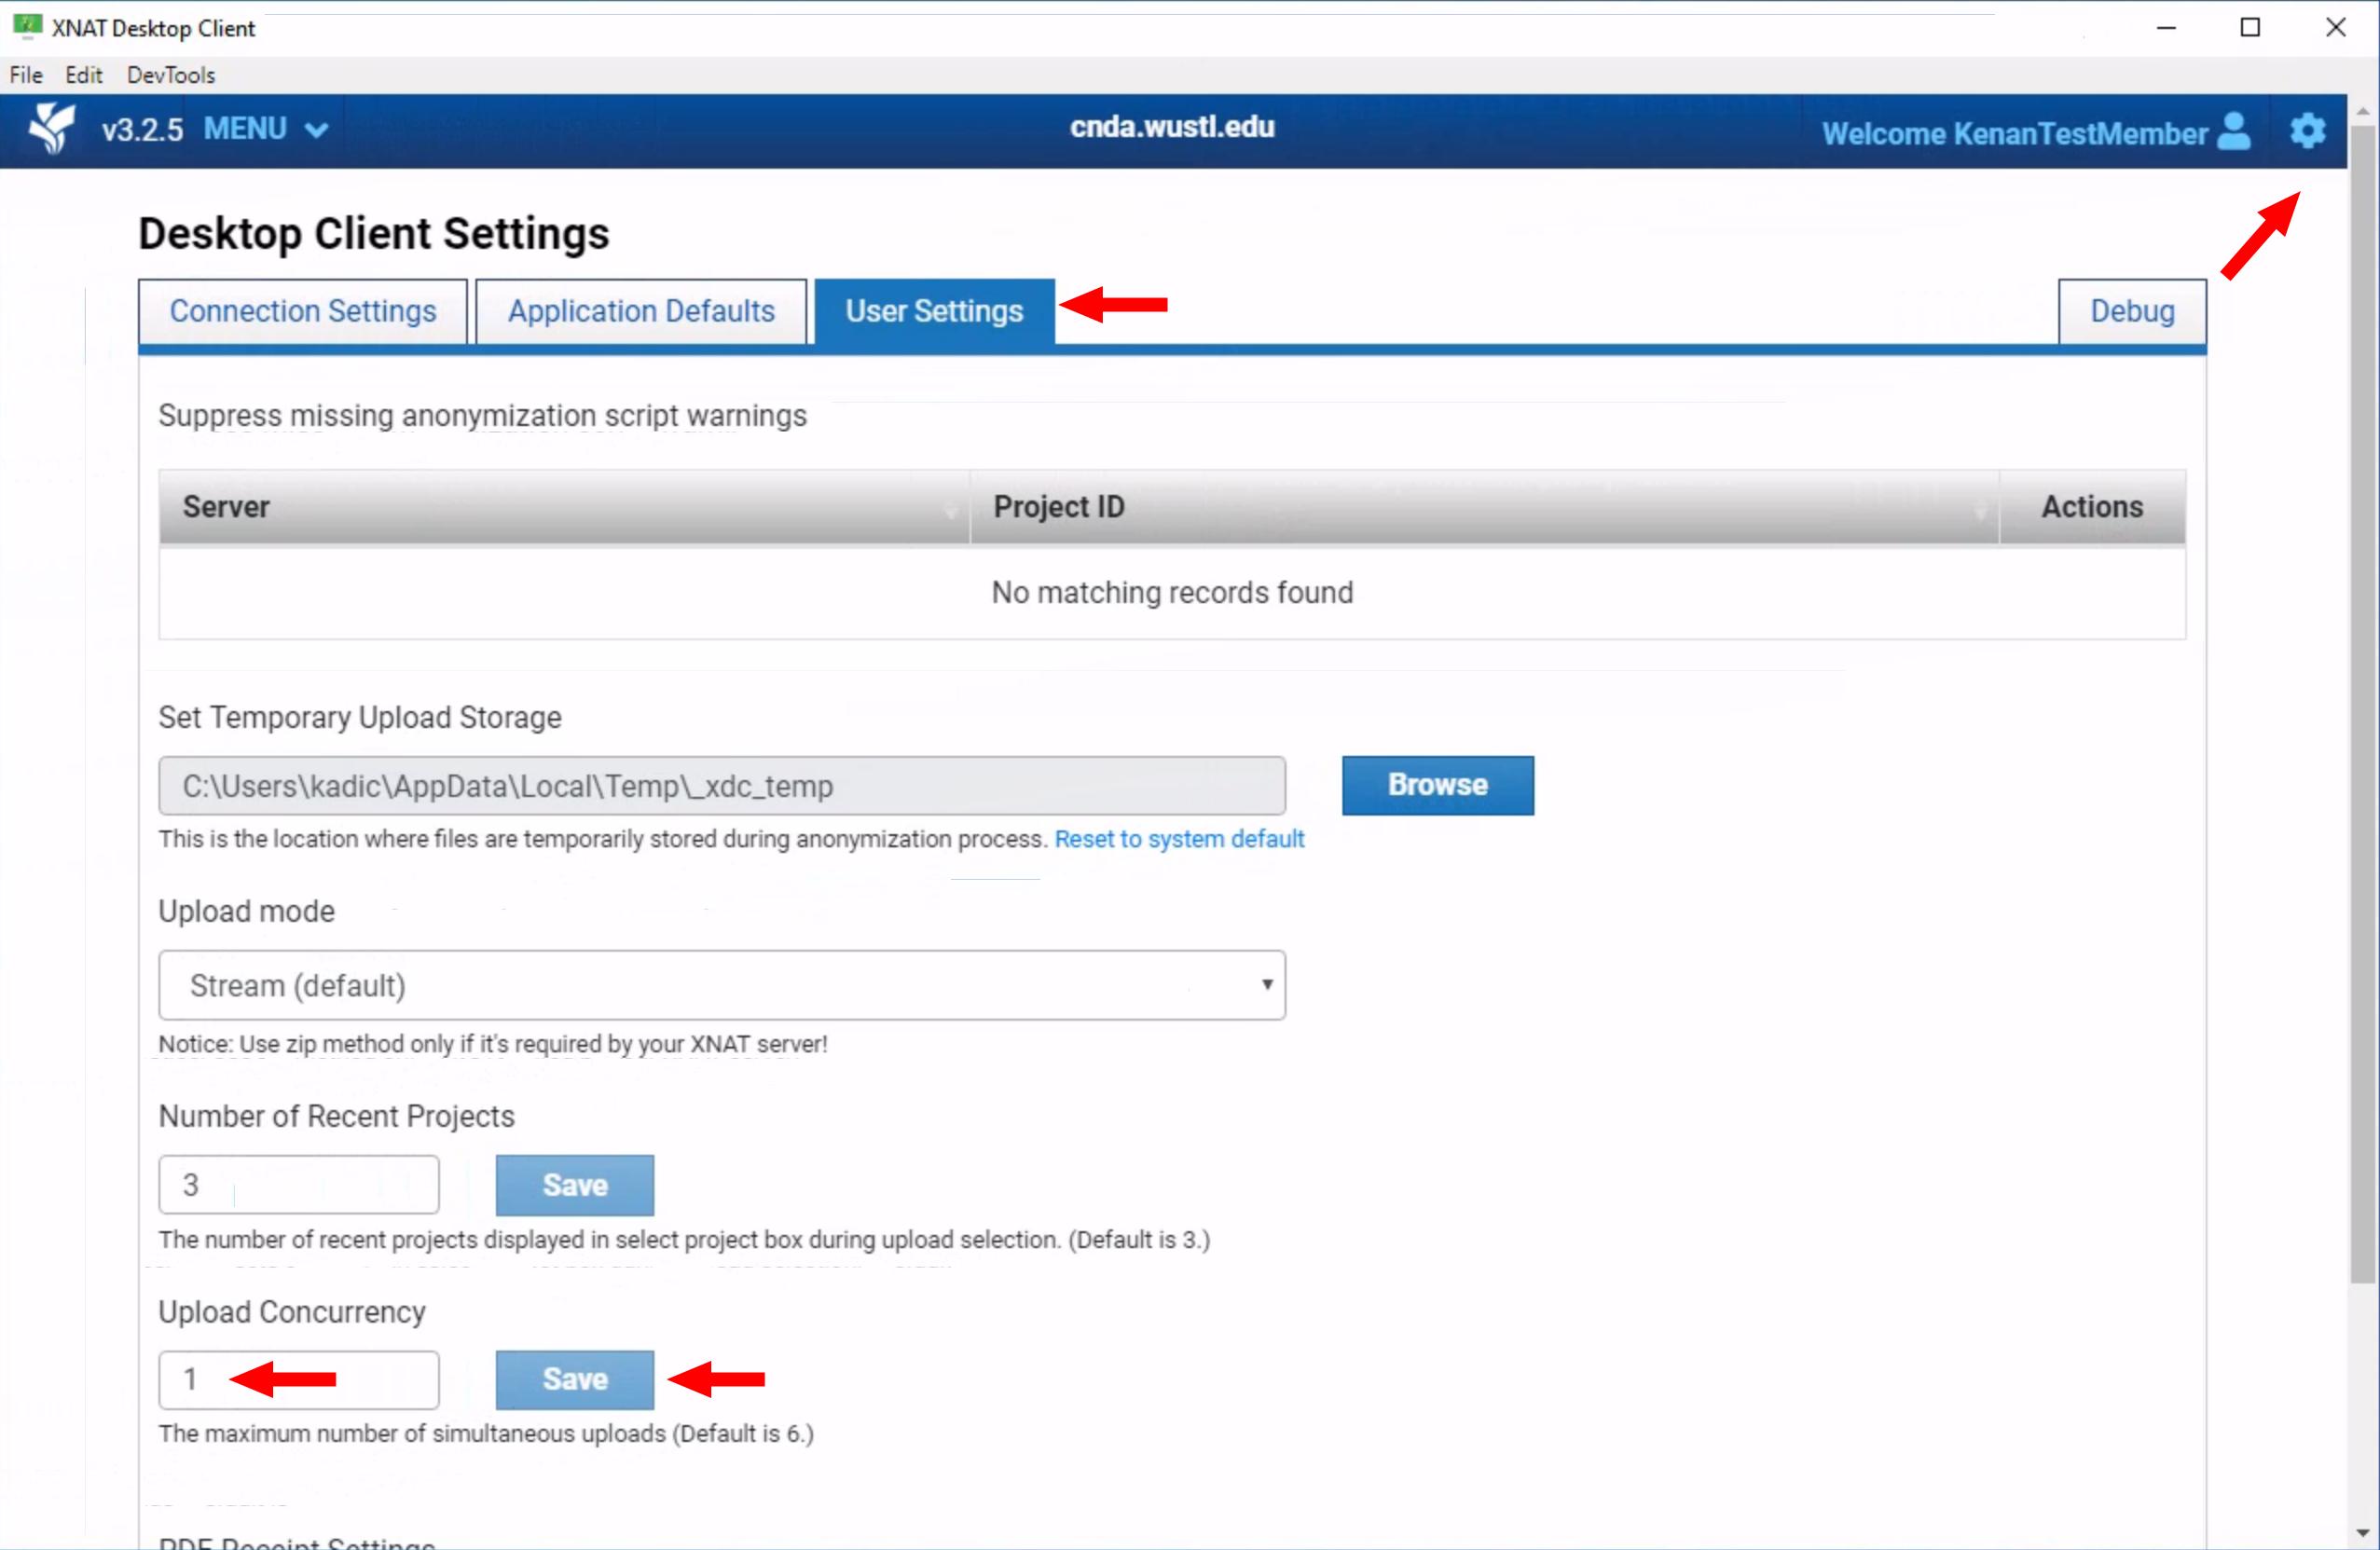
This forces uploads to run as a single stream.
Proxy or Network Issues
The client uploads data via HTTPS to https://cnda.wustl.edu
If Uploads Freeze or Fail
If your upload freezes or fails to start:
- Ask your IT team to whitelist
cnda.wustl.edu - Ensure outbound HTTPS traffic is not blocked or routed through a restrictive proxy
- Review troubleshooting steps here:
Desktop Uploader Troubleshooting Guide - If issues persist, contact: [email protected]
Uploading an Imaging Session
Launch the Client
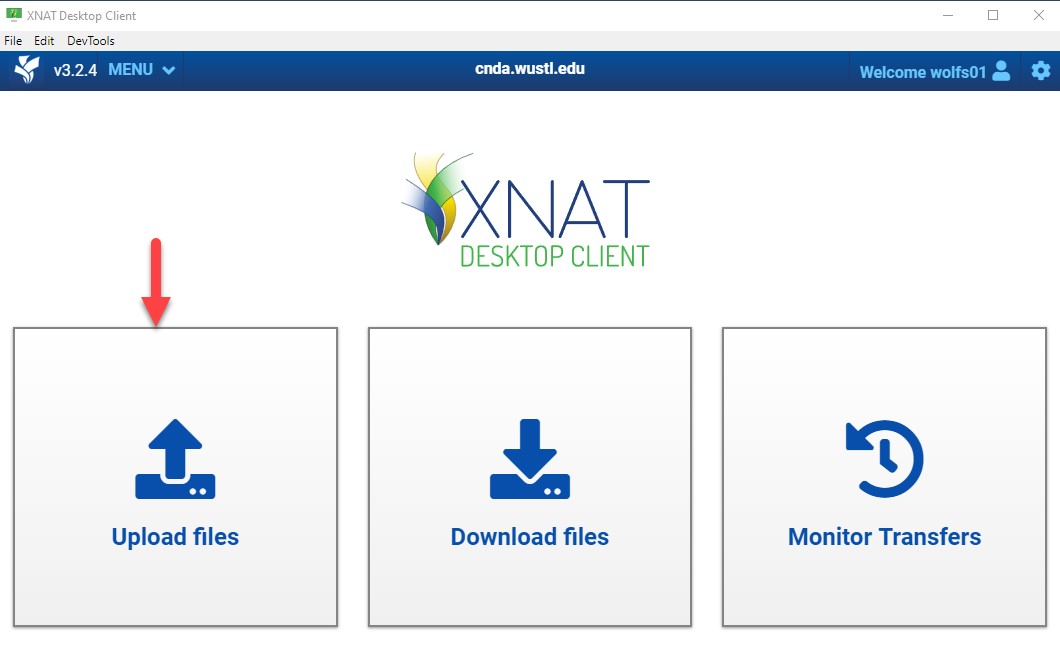
Open the XNAT Desktop Client and log in.

The Home page will display.

Start Upload
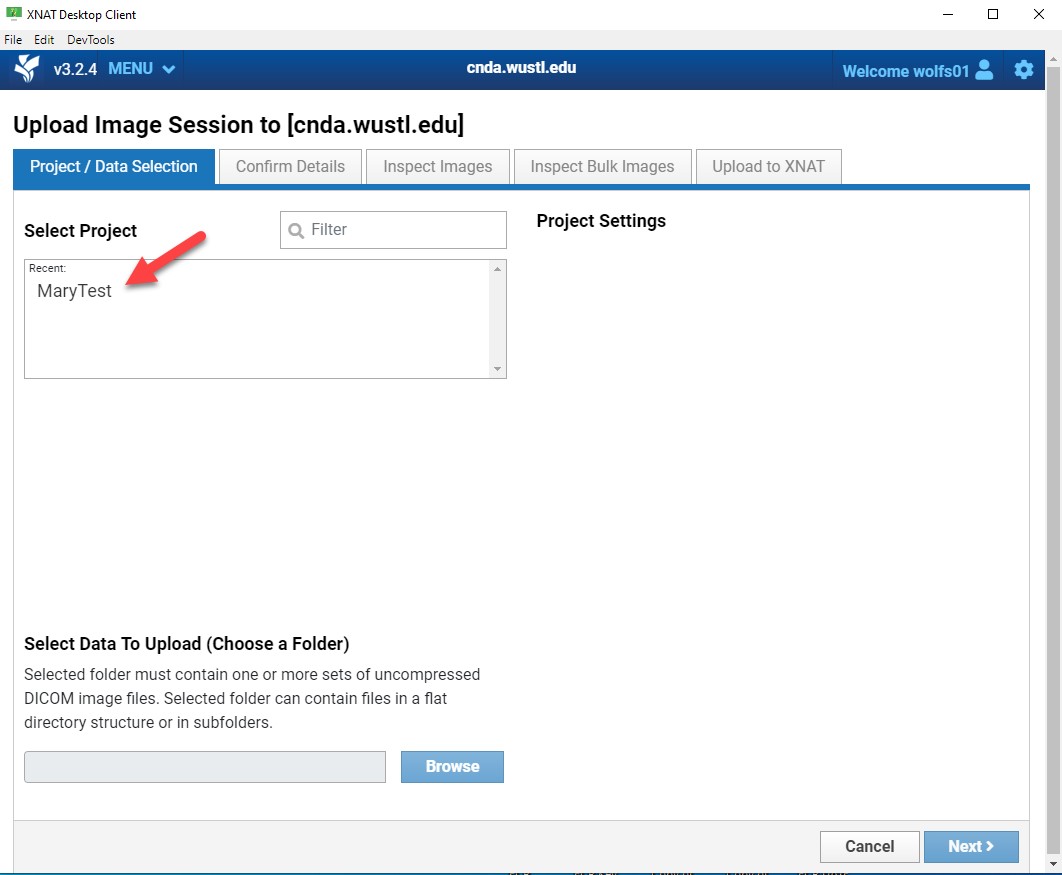
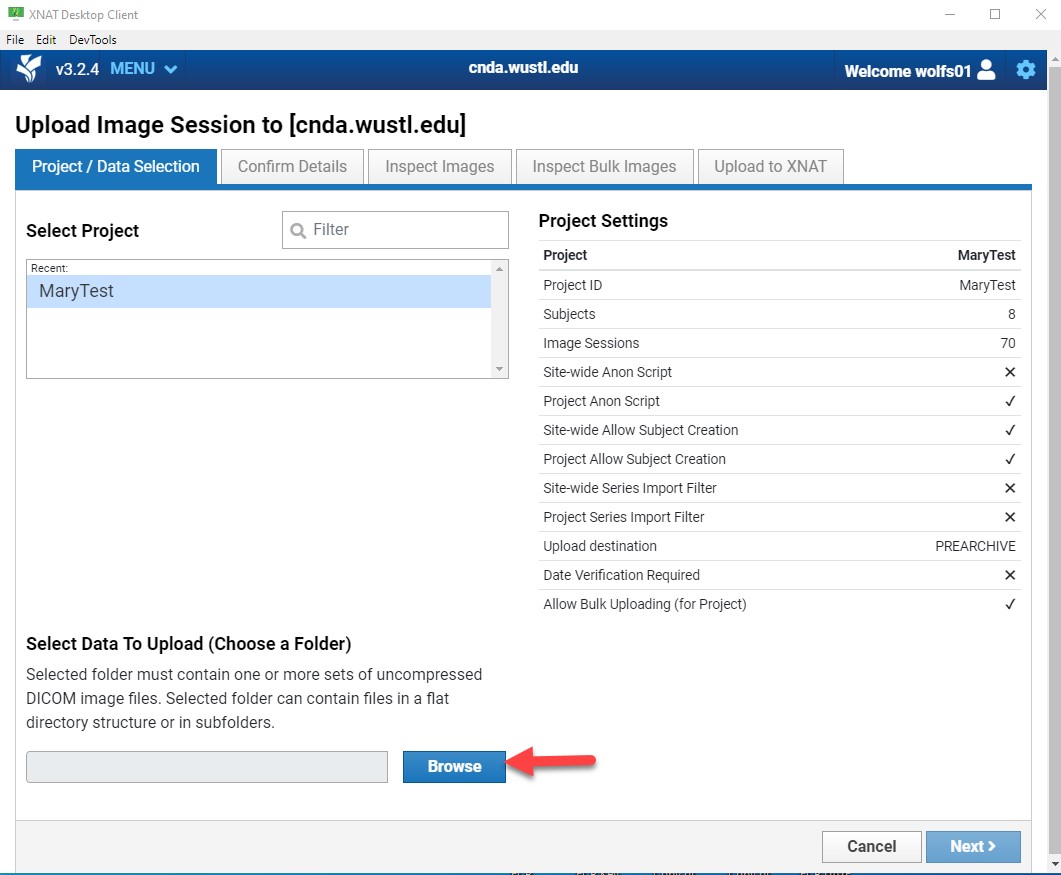
- Click Upload Files.
- Select the destination Project.
Only projects you have access to will appear.
Message About Missing Anonymization Script
When selecting your project during upload, you may see this warning:
Warning: No anonymization scripts found! Anonymization scripts are not set for this site or this project. Do you want to continue?
For most users, this message is expected and not an error.
It simply means that a server-side anonymization script is not configured for that project.
This does not prevent uploading and does not indicate a problem.
You may safely click Continue and proceed with the upload.
Note: If you are unsure whether your project should have an anonymization script, contact the CNDA team.
- Click Browse and select the directory containing your image files.
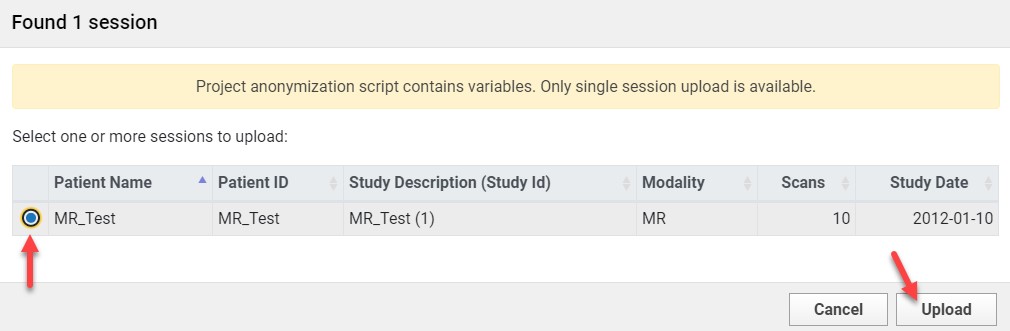
- If prompted with anonymization options, select the file and click Upload.
Subject and Session Setup
If Subject Already Exists
- Select the subject from the dropdown menu.
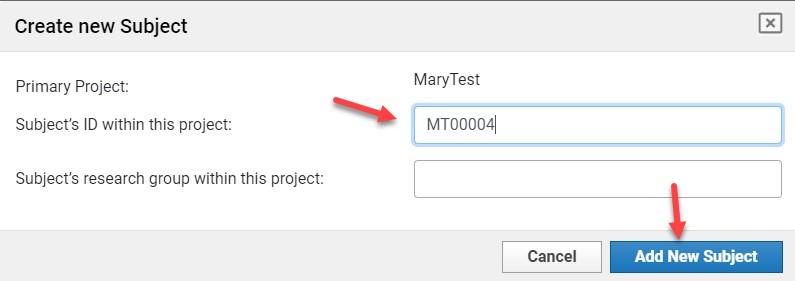
If Subject is New
- Click Create New Subject.
- Enter the Subject ID.
- Click Add New Subject.
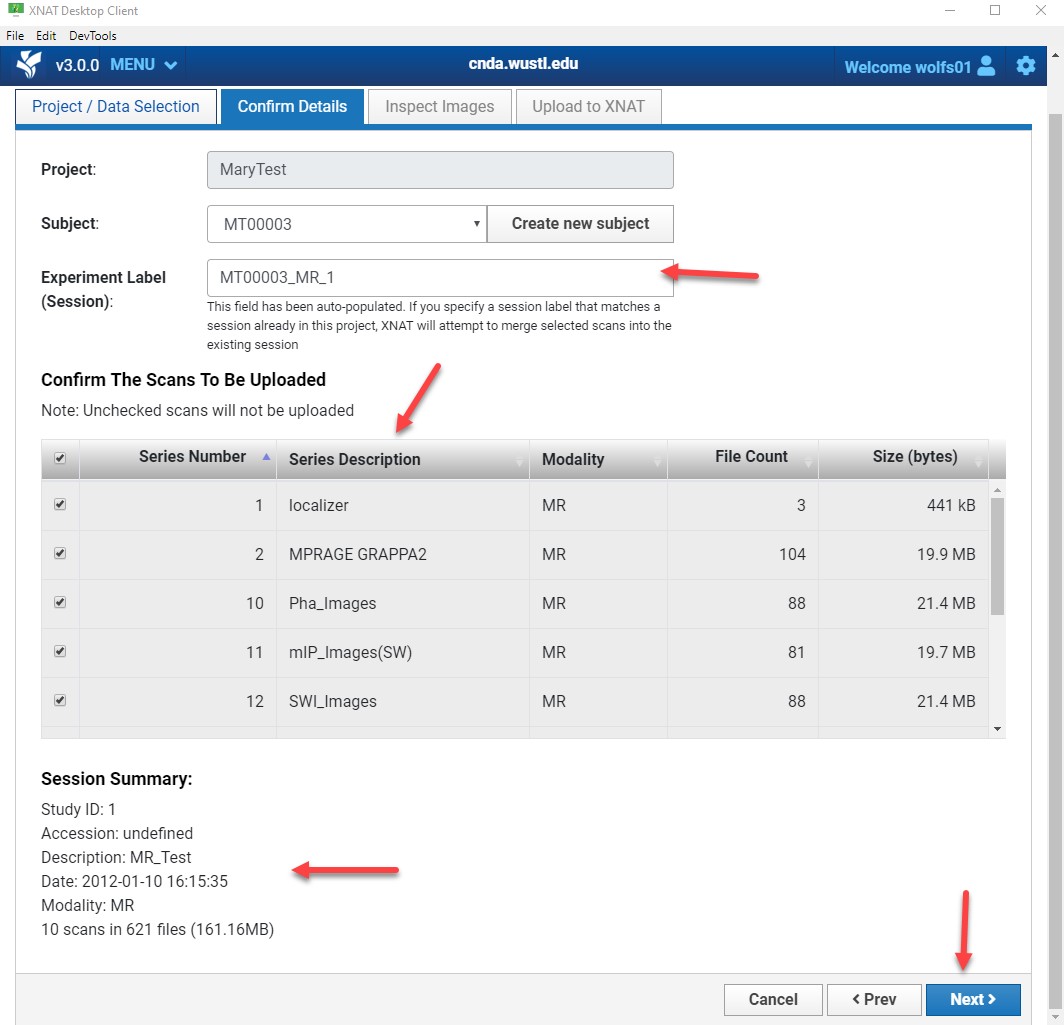
Session Label
The session label auto-fills. You may modify it if needed.
The session label must be unique within the project.
Review:
- Listed image series
- Session summary
Click Next.
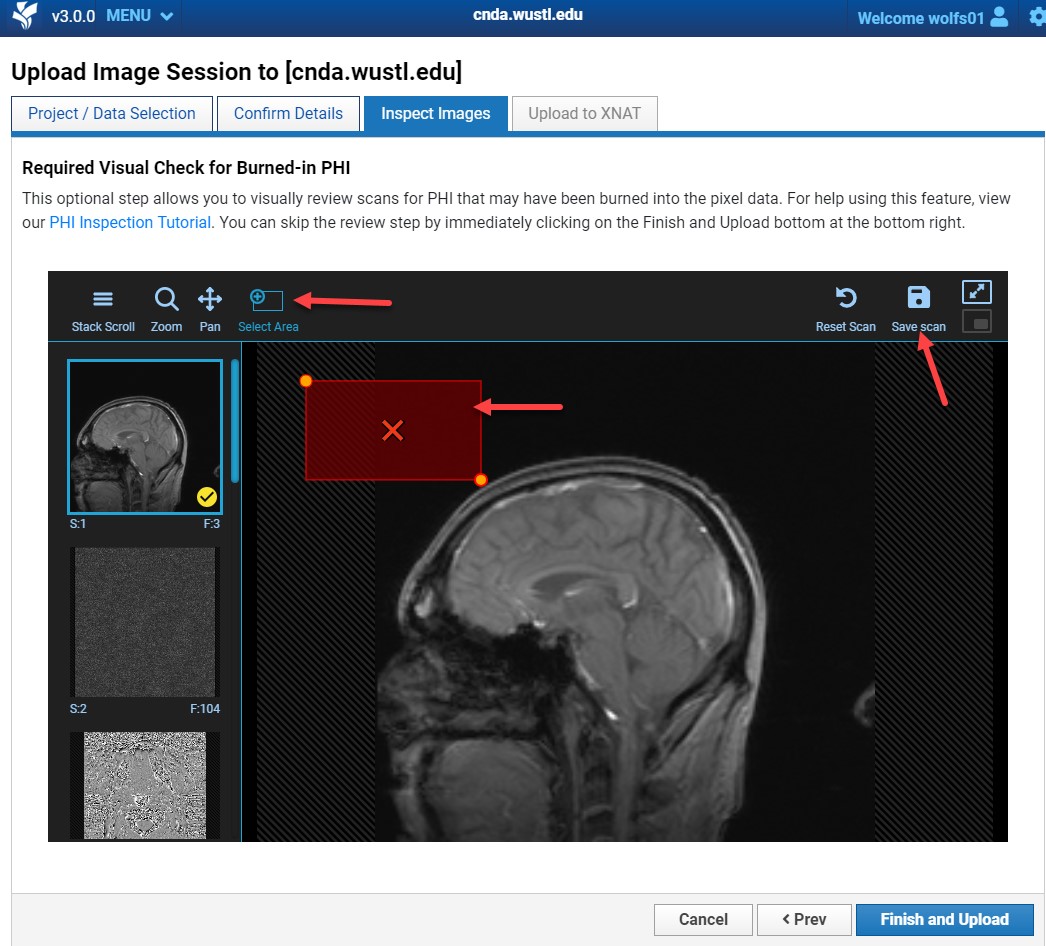
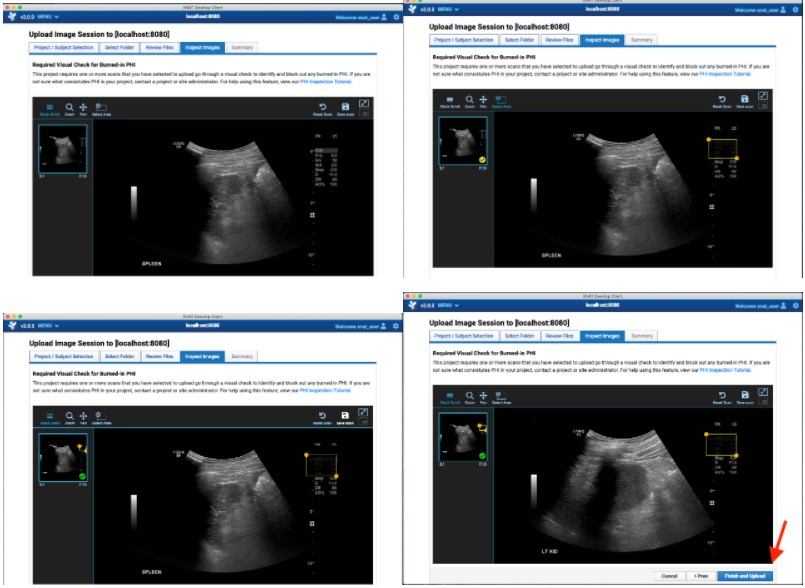
PHI Visual Inspection
All images must be reviewed for burned-in PHI.
PHI includes:
- Patient names
- Initials
- Medical record numbers
- Any identifying text
Review Steps
- Select a series from the left panel.
- Drag it into the viewer.
- Scroll through all images.
- Repeat for every series.
- Click Finish and Upload when complete.

Removing Burned-In PHI
If PHI is found:
- Click the Select Area tool.
- Draw a box around the PHI.
- Apply to the series.
- Click Save Scan.
- Repeat for all affected series.
- Click Finish and Upload.
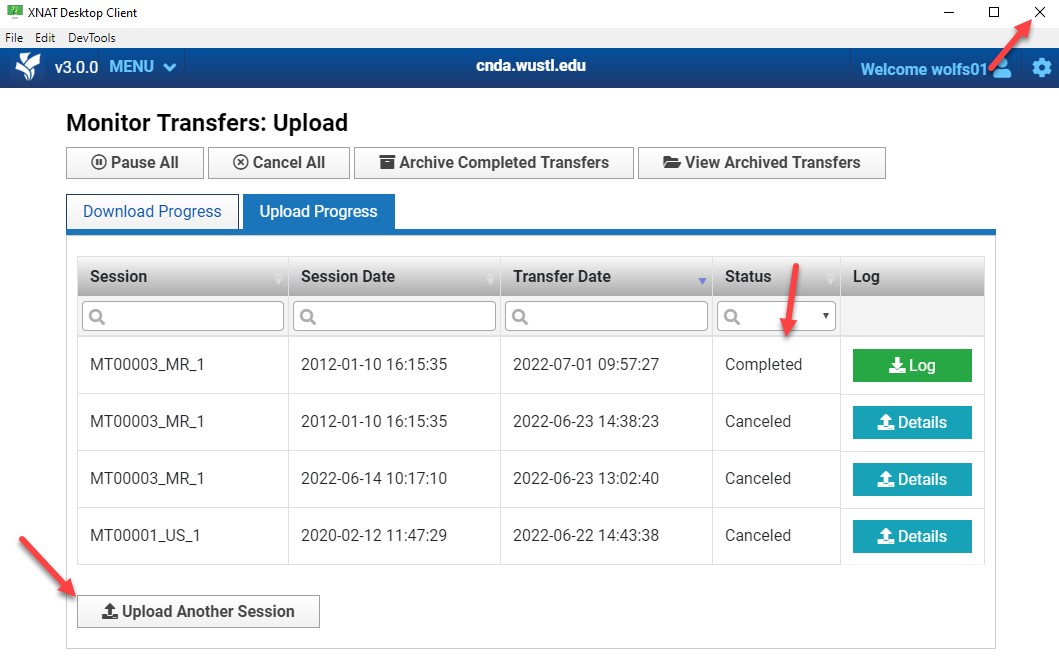
Monitor Upload Progress
The Monitor Transfers page displays upload status.
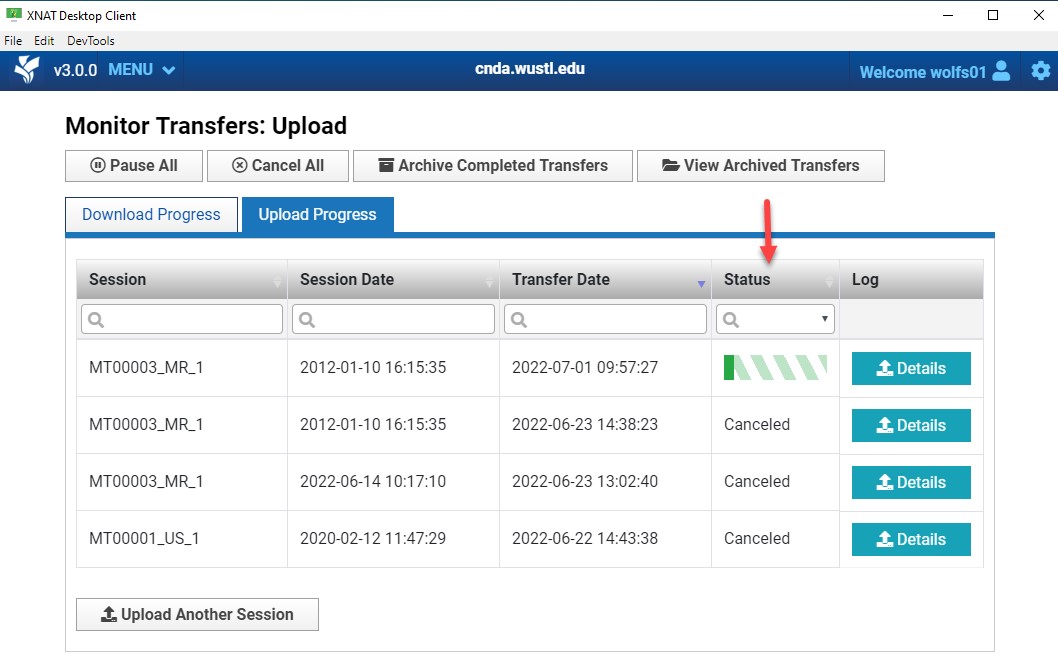
When the Status column shows Completed, the upload is finished.
Click Upload Another Session to upload another session or close the client.
Verifying Upload in CNDA
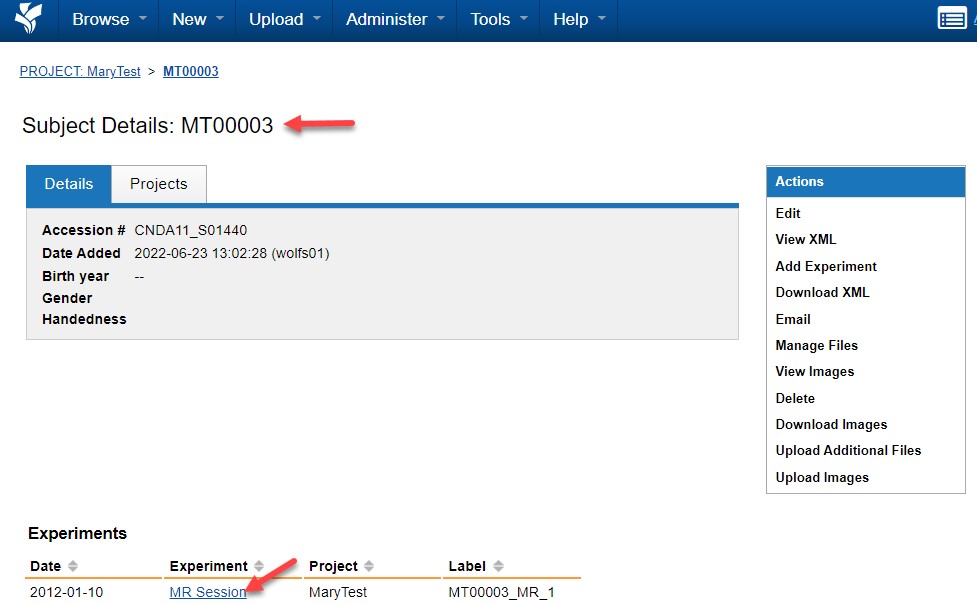
After upload completes:
- Log in to CNDA.
- Navigate to your project.
- Select the subject.
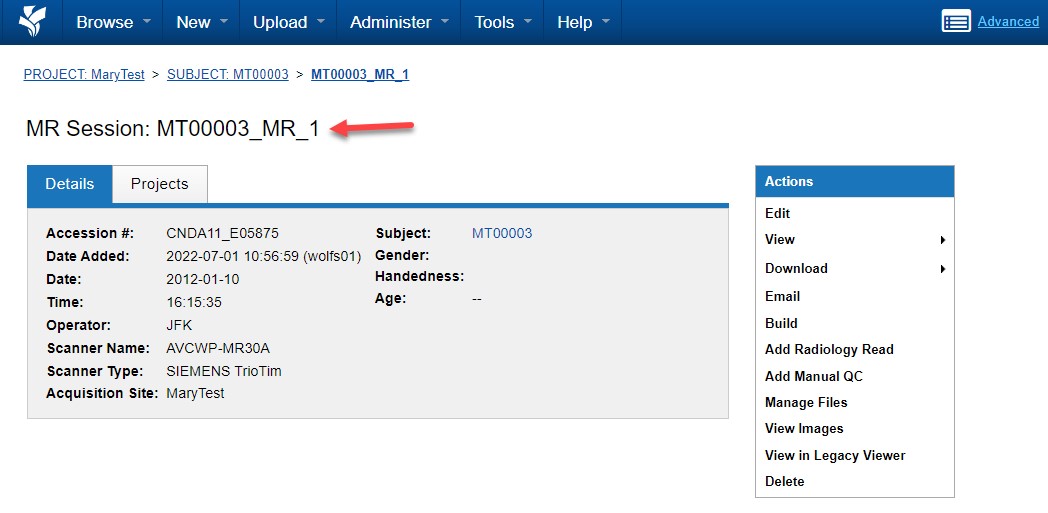
- Open the session.
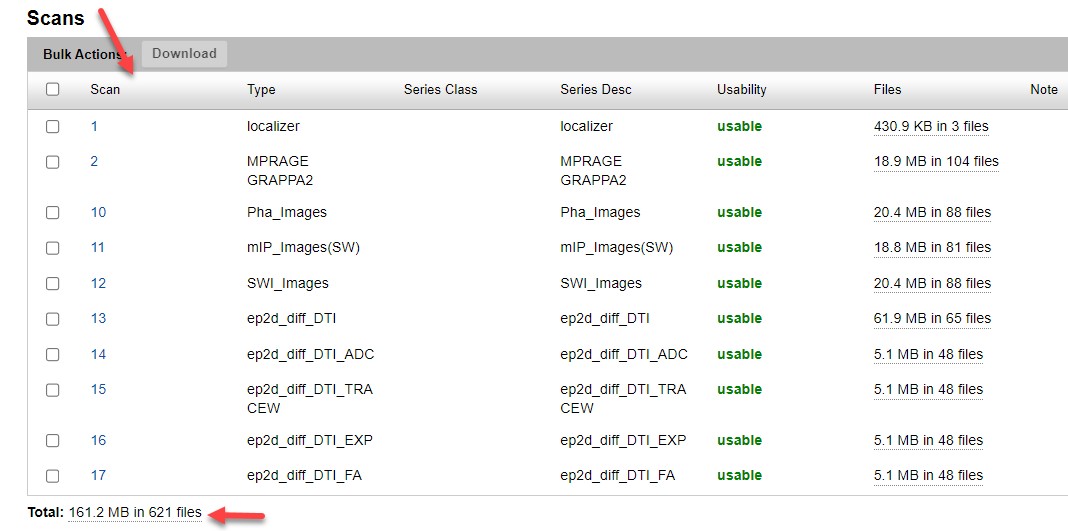
Confirm:
- All expected series are present
- Total file counts are correct
Upload process complete.