
CNDA Bulk Download
Use this script to download CNDA imaging sessions as verified ZIP archives. First, find your operating system below and complete its setup. After that, all platforms use the same CSV format and download options.
Requirements: check before you start
| Platform | What you need |
|---|---|
| Windows 10/11 | Git for Windows (Git Bash) and Python 3 |
| Linux | Bash, Python 3, curl, unzip, mktemp |
| macOS | Terminal/Bash, Python 3, curl, unzip, mktemp |
All platforms also need a CNDA2 account with access to the requested data, an XNAT alias token and secret, and adequate disk space. On Windows, run all commands in Git Bash, not Command Prompt or PowerShell. Check that curl, unzip, and mktemp are available in Git Bash before proceeding.
Platform testing status
The script has been tested on Linux. The Windows/Git Bash and macOS instructions are provided, but those platforms have not yet been tested end-to-end. Downloads that include actual session-level resources also still need verification.
Before you install: CNDA2 access and credentials
CNDA2 is available at cnda.wustl.edu; the address has not changed.
- New to CNDA2? Follow How to Register Your CNDA2 Account.
- External collaborator without a WashU Key? A WashU PI must sponsor your WashU Key. See How to Obtain a WashU Key before registering.
- Using this script? Follow Generate and Use an XNAT Alias Token. You need both the alias token and its secret. Alias tokens are valid for 90 days. After expiration, generate a new token and secret to continue downloading.
For account, project-access, or download assistance, email [email protected].
Choose your operating system: Windows · Linux · macOS
Windows setup
1. Install the required software
Install Git for Windows (which includes Git Bash) and Python 3 for Windows. During Python installation, enable its PATH option if offered. Open or reopen Git Bash after installing.
Verify that the required commands work inside Git Bash:
for cmd in bash curl python3 unzip mktemp; do
  command -v "$cmd" || echo "MISSING: $cmd"
done
python3 --version
The script requires a working command named python3, not just an installed Python application. On some Windows systems, python3 is missing or opens the Microsoft Store instead of running Python. If so, check your Python installation and PATH, and disable the python3 App execution alias in Windows Settings if it points to the Store. Reopen Git Bash and run python3 --version again; do not proceed until it prints a Python 3 version.
If any other command is missing, resolve that installation or PATH issue before proceeding. In Git Bash, ~ refers to your home directory; Windows locations may also be written as /c/Users/YourUser/....
2. Download the script
Download cndaBulkDownload.txt in your browser. Save it in your home directory, then rename it to cndaBulkDownload.sh. Or use the following commands in Git Bash to download and rename the script:
curl -fL https://cnda-help.wustl.edu/cndaBulkDownload.txt \
  -o ~/cndaBulkDownload.txt
mv ~/cndaBulkDownload.txt ~/cndaBulkDownload.sh
bash -n ~/cndaBulkDownload.sh
The bash -n check prints nothing when the script has valid Bash syntax. An error message indicates a problem with the downloaded file.
3. Run a download
Create ~/sessions.csv using the CSV example below, and obtain your CNDA alias token. Then run in Git Bash:
bash ~/cndaBulkDownload.sh -u YOUR_ALIAS -s ~/sessions.csv -d ~/cnda_downloads
Use -c ~/creds.json instead of -u YOUR_ALIAS for unattended use, as explained below.
Linux setup
1. Install the required software
For Ubuntu or Debian:
sudo apt update
sudo apt install -y bash curl python3 unzip
Other distributions can use their package managers. mktemp is normally installed with the core utilities. Verify:
for cmd in bash curl python3 unzip mktemp; do
  command -v "$cmd" || echo "MISSING: $cmd"
done
python3 --version
2. Download the script
Download cndaBulkDownload.txt from your browser and rename it to cndaBulkDownload.sh in your home directory. Alternatively:
curl -fL https://cnda-help.wustl.edu/cndaBulkDownload.txt \
  -o ~/cndaBulkDownload.txt
mv ~/cndaBulkDownload.txt ~/cndaBulkDownload.sh
bash -n ~/cndaBulkDownload.sh
The bash -n check prints nothing when the script has valid Bash syntax. An error message indicates a problem with the downloaded file.
3. Run a download
After creating ~/sessions.csv and obtaining your CNDA alias token:
bash ~/cndaBulkDownload.sh -u YOUR_ALIAS -s ~/sessions.csv -d ~/cnda_downloads
macOS setup
1. Install the required software
Open Terminal. Bash, curl, unzip, and mktemp are normally available. Install Python 3 from python.org or, if you use Homebrew:
brew install python
Verify:
for cmd in bash curl python3 unzip mktemp; do
  command -v "$cmd" || echo "MISSING: $cmd"
done
python3 --version
2. Download the script
Download cndaBulkDownload.txt in your browser, then save or rename it as ~/cndaBulkDownload.sh. Alternatively, from Terminal:
curl -fL https://cnda-help.wustl.edu/cndaBulkDownload.txt \
  -o ~/cndaBulkDownload.txt
mv ~/cndaBulkDownload.txt ~/cndaBulkDownload.sh
bash -n ~/cndaBulkDownload.sh
The bash -n check prints nothing when the script has valid Bash syntax. An error message indicates a problem with the downloaded file.
3. Run a download
After creating ~/sessions.csv and obtaining your CNDA alias token:
bash ~/cndaBulkDownload.sh -u YOUR_ALIAS -s ~/sessions.csv -d ~/cnda_downloads
Prepare a session list and credentials
All three platforms use the same CSV format. Create a UTF-8 file named sessions.csv in your home directory. Use a plain text editor, or in Microsoft Excel select Save As → CSV UTF-8 (Comma delimited) (.csv). Both Project,Subject,Session and Project,SubjectLabel,SessionLabel are accepted headers; a header is optional.
Project,SubjectLabel,SessionLabel
KenanTestingUploader,smal_series,smal_series_MR_1
KenanTestingUploader,tiny_series,tiny_series_MR_1
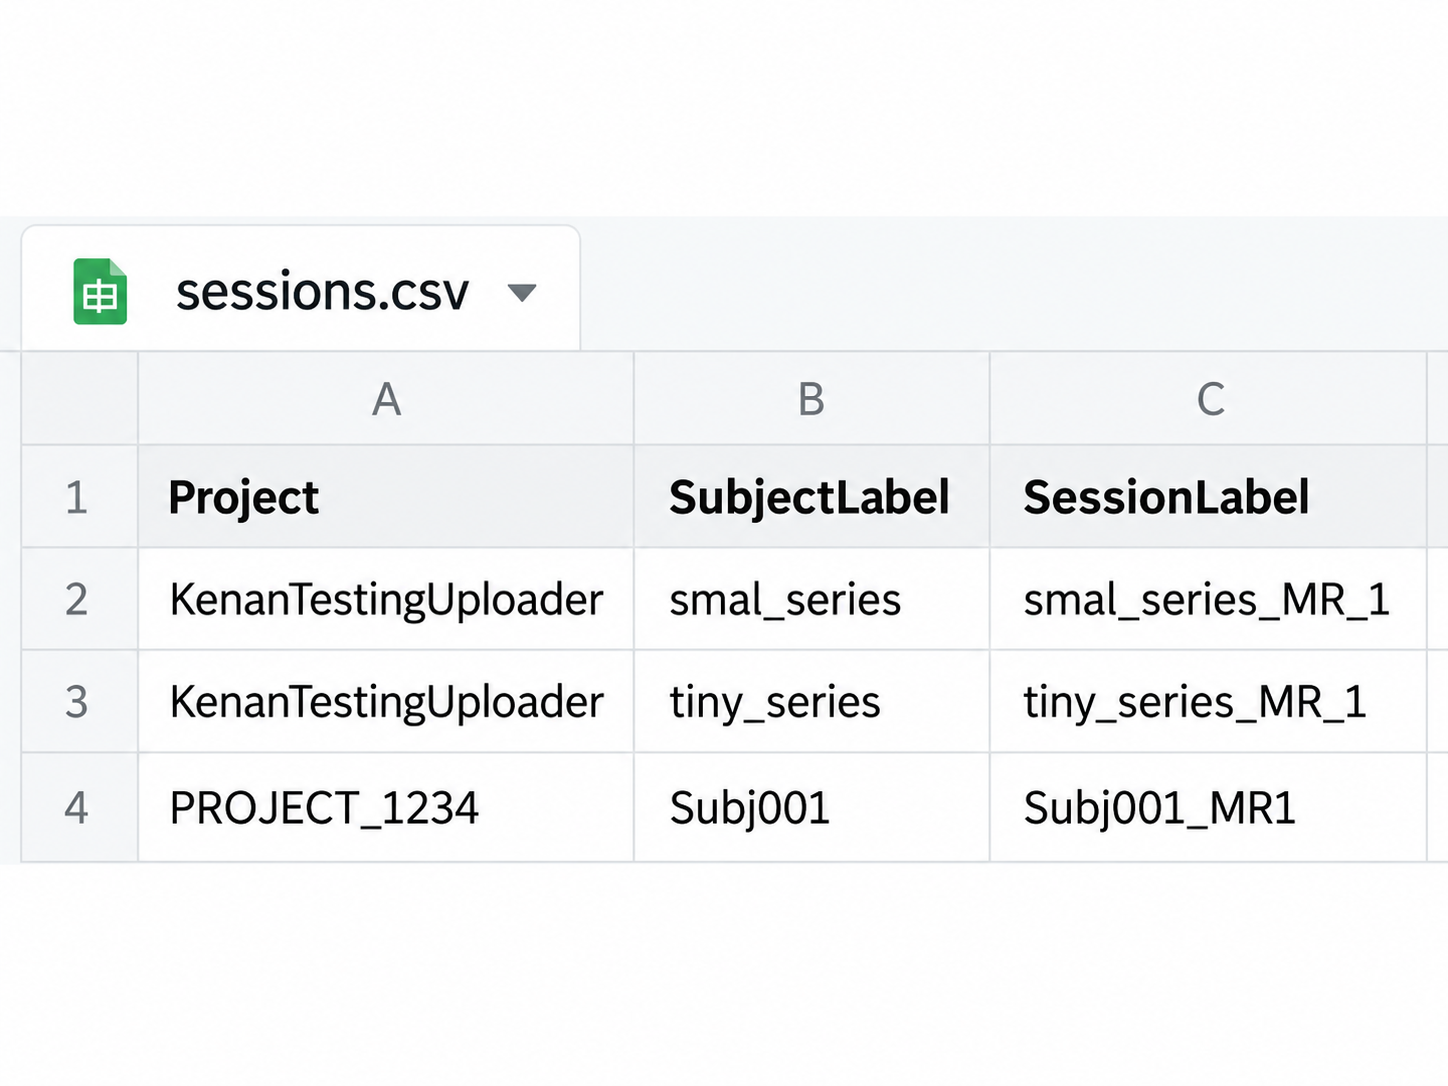
Replace the sample data with your CNDA project ID, subject label, and session label. Use the project ID shown in CNDA, not the project’s descriptive title. Use the subject and session labels displayed in CNDA, not internal experiment IDs such as CNDA23_E03299. Spelling and capitalization must match.
Use an XNAT alias token and secret (setup instructions), not your WashU Key password. With -u YOUR_ALIAS, the script prompts once for the secret without displaying it.
For unattended use, create a private ~/creds.json file:
{
  "alias": "YOUR_ALIAS",
  "secret": "YOUR_ALIAS_SECRET"
}
On Linux and macOS, use chmod 600 ~/creds.json to restrict file access. On Windows, keep it in a private folder. Do not share or commit credentials.
Run with the file instead of an interactive prompt:
bash ~/cndaBulkDownload.sh -c ~/creds.json -s ~/sessions.csv -d ~/cnda_downloads
Unattended downloads and automatic reauthentication
Large CNDA downloads can take hours. If the CNDA login session expires, the script automatically signs in again and continues processing the download queue. Both -u and -c support this during a running download: with -u, the script asks for your alias secret once and retains it for that run; with -c, it reads the alias token and secret from your credentials file. For scheduled or unattended starts, use -c, so the script can sign in without waiting for someone to enter the secret.
This automatic sign-in does not renew your XNAT alias token. Alias tokens are valid for 90 days; if yours expires, generate a new token and secret.
Use either -u or -c, never both. Run the commands in Git Bash on Windows or Terminal on Linux/macOS.
Download an entire project
To discover and download supported imaging sessions from a CNDA project:
bash ~/cndaBulkDownload.sh \
  -c ~/creds.json \
  -p YOUR_PROJECT_ID \
  -d ~/cnda_downloads
A project may contain large sessions
Project mode selects all supported imaging sessions in the project unless filtered. Check the project contents and available storage before starting. You can stop with Ctrl+C, but an in-progress session will need to download again on the next run.
For MR sessions only:
bash ~/cndaBulkDownload.sh \
  -c ~/creds.json \
  -p YOUR_PROJECT_ID \
  -t xnat:mrSessionData \
  -d ~/cnda_downloads
The -t filter is for project mode only; it cannot be combined with -s. Other possible XNAT session datatype names include xnat:petSessionData and xnat:ctSessionData; use a datatype actually present in your CNDA project.
Optional download settings
| Option | Behavior |
|---|---|
-s sessions.csv | Download sessions listed in a CSV, including across multiple projects |
-p PROJECT_ID | Discover all supported imaging sessions in a project |
-t xnat:mrSessionData | Filter project downloads by session datatype |
-d DIR | Set the destination directory |
--include-resources | Request discoverable session-level resources as well as DICOM scans |
--original-structure | Use CNDA's original archive directory structure instead of simplified paths |
--force | Redownload even if an existing matching ZIP is valid |
--shared | Set group-readable permissions for newly installed ZIPs and project folders |
-h, --help | Display command usage |
Example requesting original structure:
bash ~/cndaBulkDownload.sh \
  -c ~/creds.json \
  -s ~/sessions.csv \
  -d ~/cnda_downloads \
  --original-structure
Example including session-level resources:
bash ~/cndaBulkDownload.sh \
  -c ~/creds.json \
  -s ~/sessions.csv \
  -d ~/cnda_downloads \
  --include-resources
The --include-resources option does not add resources if none exist at the session level. It does not promise to include every resource at other levels of the CNDA hierarchy.
Where downloads and reports are saved
For a sample session, the files look like:
cnda_downloads/
└── KenanTestingUploader/
    └── smal_series/
        ├── smal_series_MR_1.zip
        └── smal_series_MR_1.zip.cnda.json
- The
.zipcontains downloaded session data. - The
.zip.cnda.jsonrecords the settings associated with the validated ZIP. Keep it alongside the ZIP so future runs can safely decide whether to skip the download. - A
logs/directory is created in the terminal's current working directory (not necessarily under the destination). Each run generates a timestamped log and CSV report.
For example, if you start the script from your home directory:
~/logs/cndaBulkDownload_YYYYMMDD_HHMMSS_PID.log
~/logs/cndaBulkDownload_YYYYMMDD_HHMMSS_PID.csv
A successful first download of one session might show:
OK
SUMMARY: OK=1 FAIL=0 SKIP=0 TOTAL=1
Running the same command again, with an unchanged and verified ZIP already present, might show:
SKIP verified ZIP matching requested mode
SUMMARY: OK=0 FAIL=0 SKIP=1 TOTAL=1
OK counts new successful downloads, FAIL counts failed or invalid items, SKIP counts existing matching verified downloads, and TOTAL is the total counted input work.
Previously downloaded sessions
The script automatically skips existing ZIP files that pass integrity checks and match the recorded download settings.
If scans or resources have been added or changed in CNDA since the last download, use --force to download fresh archives. The script does not automatically detect changes on the CNDA server.
Important: --force redownloads every session included in that run. To refresh only specific sessions, put only those sessions in a CSV file and run with -s sessions.csv --force.
Verify a downloaded ZIP
On Linux/macOS/Git Bash, test a specific archive:
unzip -tqq ~/cnda_downloads/YOUR_PROJECT/YOUR_SUBJECT/YOUR_SESSION.zip
echo "ZIP check exit code: $?"
Exit code 0 means unzip did not detect an archive integrity error. It does not establish that the archive includes every expected series.
Troubleshooting
| Symptom | What to check |
|---|---|
Missing required command: python3 or python3 opens the Microsoft Store | Install/configure Python 3 so python3 --version works in Git Bash; check PATH and the Windows App execution alias |
Missing required command: unzip | Install or enable unzip in that terminal environment |
Missing credentials | Confirm the path supplied with -c exists |
AUTH ERROR / HTTP 401 | Verify the XNAT alias token and secret, including expiration |
| Permission denied | Choose a destination you can write to and verify folder permissions |
| One session fails but others work | Review that session's entry and the run's CSV report |
unable to resolve unique experiment ID | Confirm the project ID and the subject/session labels in the CSV; check exact spelling and capitalization, and verify project access |
| Existing ZIP downloads again | Check for missing/mismatched metadata, a corrupt ZIP, or use of --force |
| ETA seems inaccurate | CNDA's estimate may not equal the compressed ZIP's final size |
| Ctrl+C stops a download | Expected. Completed ZIPs can be skipped on the next run; partial session transfers do not resume byte-for-byte |
| Windows command fails | Confirm that you are using Git Bash and that bash, python3, curl, unzip, and mktemp all resolve |
The script exits with a nonzero exit code if any session fails; check the CSV report for individual results.
If a session fails, preserve the terminal error and the timestamped .csv and .log report when requesting support. Never share credentials files or alias secrets.
Before a large download
- Confirm you can access the CNDA project/session.
- Verify your dependencies and Python 3 installation.
- Test with one small session first.
- Check free disk space for the expected ZIP files and temporary downloads, especially when using
--force. - Keep ZIPs together with their
.cnda.jsoncompanions. - Use
--forceonly when you intend to redownload an existing session.