
Downloading Sessions From CNDA
Instructions
NOTE: Before starting any download, first check how much storage space you have available. No download method will work if there is not enough storage space.
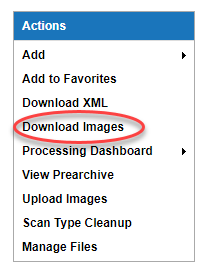
Go to the Project page. In the Actions box at the top right, click on Download Images.
The Imaging Data Download form displays.
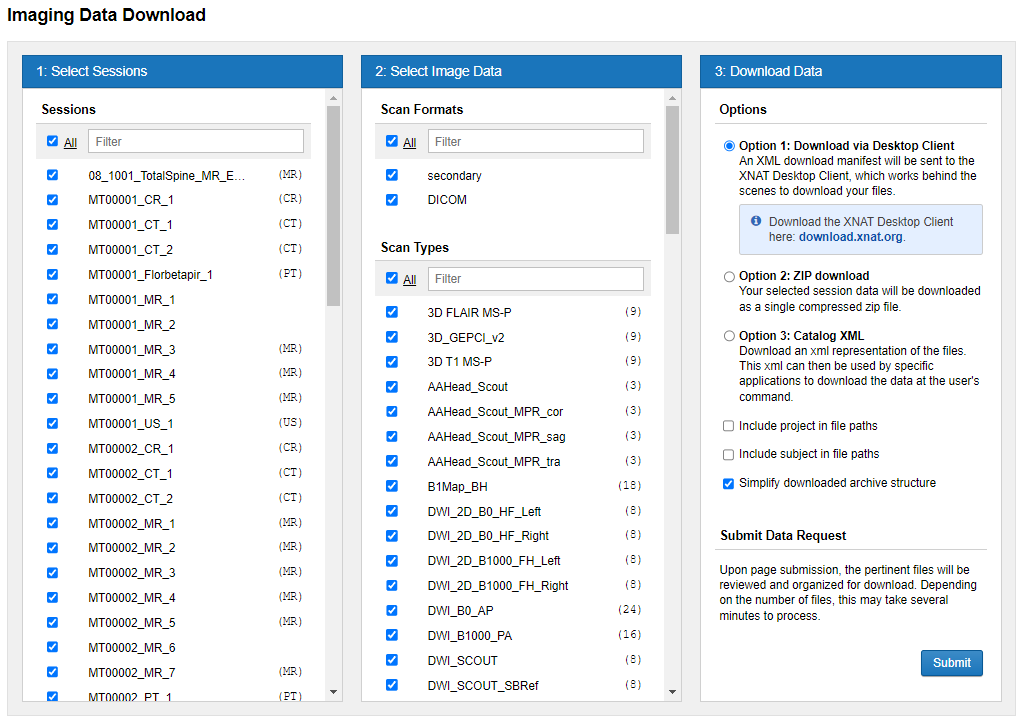
This form has 3 columns:
- The left column allows you to select which sessions you need.
- The middle column allows you to select specific types of scans if searching only for something very specific. If you want everything from a session, leave this unchanged.
- At the bottom of the middle column you may also see resource folders for raw data if available.
- The right column allows you to select your download method.
Click check boxes in the left column to Select Sessions.
Click check boxes in the middle column to Select Scan Types.
Click in the right column to select the Download Option you want to use.
You have 2 main download options here:
Download via Zip
- If your download can complete in less than 30 minutes (usually for sessions smaller than 20GB), I recommend Option 2: ZIP Download.
- Option 2 is a great choice for smaller downloads.
- Option 2 has no ability to resume after a failure. If the download fails for any reason, you will have to start over.
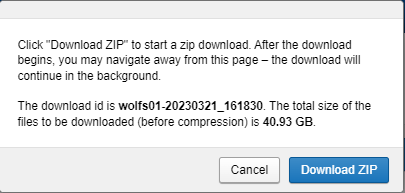
- If you proceed with Option 2: Zip Download, you will be shown the download size and prompted to click Download ZIP as seen below:
Download via Desktop Client
If your download is large and cannot complete in 30 minutes, I recommend Option 1: Download via Desktop Client.
If you choose Option 1, you will need to download and install the XNAT Desktop Client first.
After you install the Desktop Client, you will want to go back to the same CNDA download page and start the download with Option 1.
The XNAT Desktop Client can resume a download even if it gets interrupted.
Desktop Client users will need an Alias Token and Secret to sign in to the app directly. See Generate and Use an XNAT Alias Token.
You don't need all the instructions below, but you do need the info on how to download this application and install it.
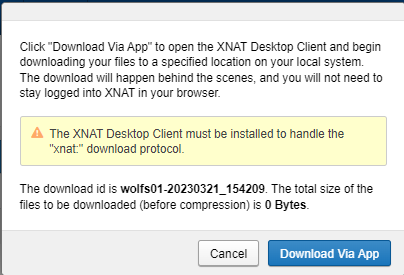
If you proceed with Option 1: Download via Desktop Client, you will be prompted to click Download via App as seen below:
After picking your download option, click Submit.
Note: If you chose Zip Download, this is the end of the process. Once you click Download ZIP, your file will save normally through your browser. The remaining steps below apply only if you chose Download via Desktop Client.
When you press Download via App, a new popup page will open.
On that page, you have to press Open XNAT-DesktopClient.
You also have the choice to always allow opening so it does not ask again in the future.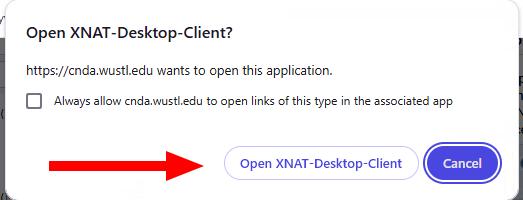
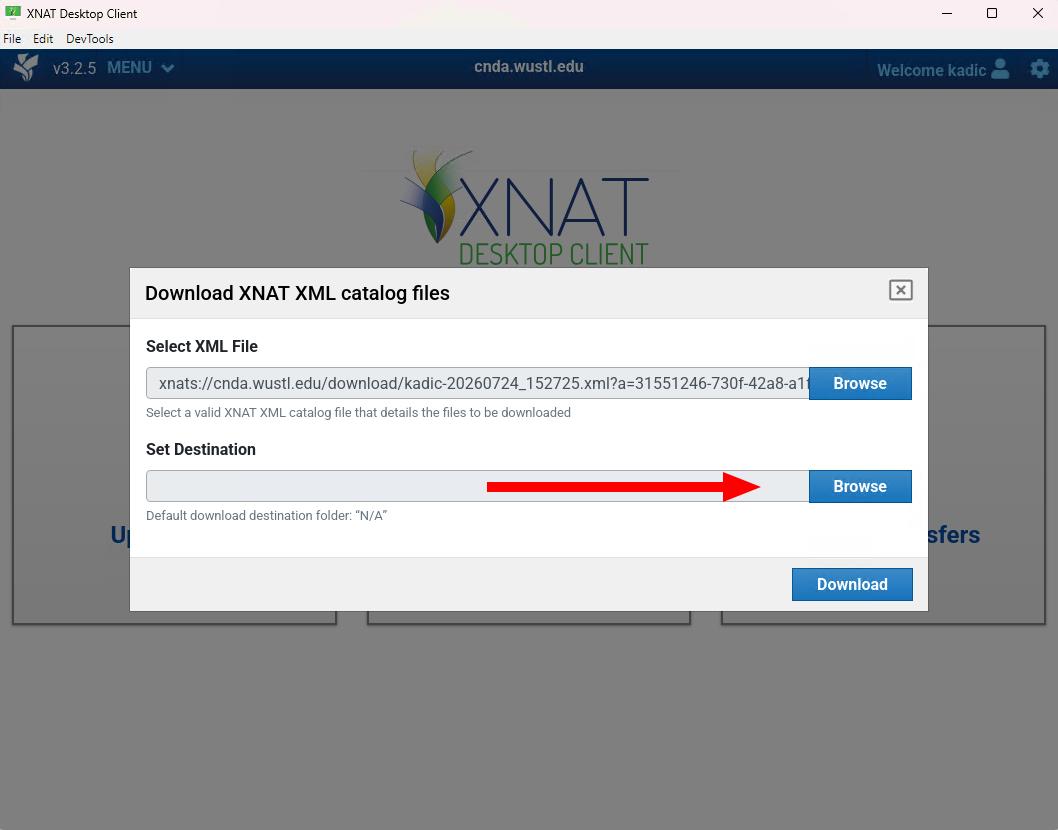
The Desktop Client will open to a Download XNAT XML catalog files window. The Select XML File field will already be filled in automatically. The app logs you in and pulls the correct file list through your existing CNDA session, so you don't need to enter an Alias Token or any other credentials here.
Click Browse next to Set Destination to choose where the download should be saved.
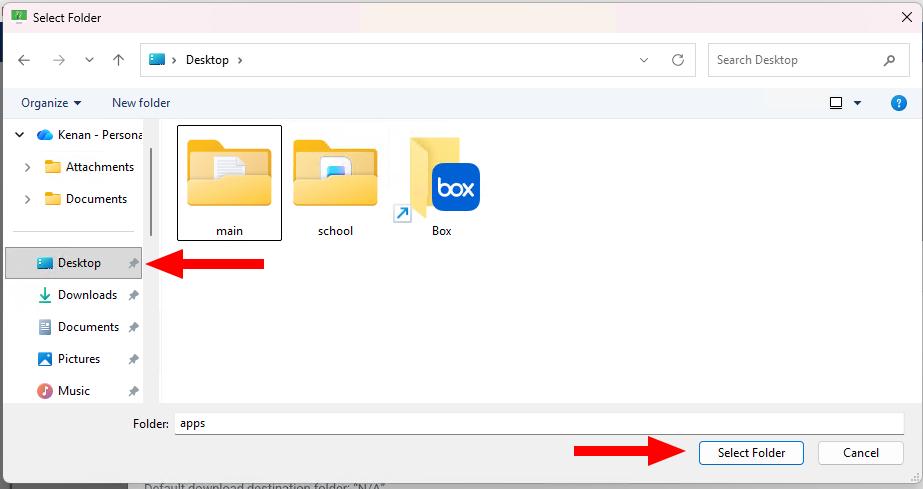
In the Select Folder window, choose the folder you want to save to (for example, a folder on your Desktop), then click Select Folder.
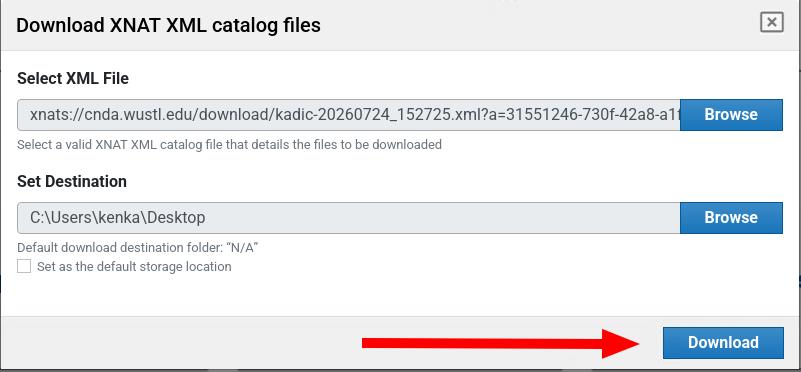
Your chosen destination now shows in the Set Destination field. Optionally check Set as the default storage location if you want this folder used automatically next time. Click Download to begin.
The Monitor Transfers: Download screen shows your transfer in progress, with a green progress bar tracking the file as it downloads.
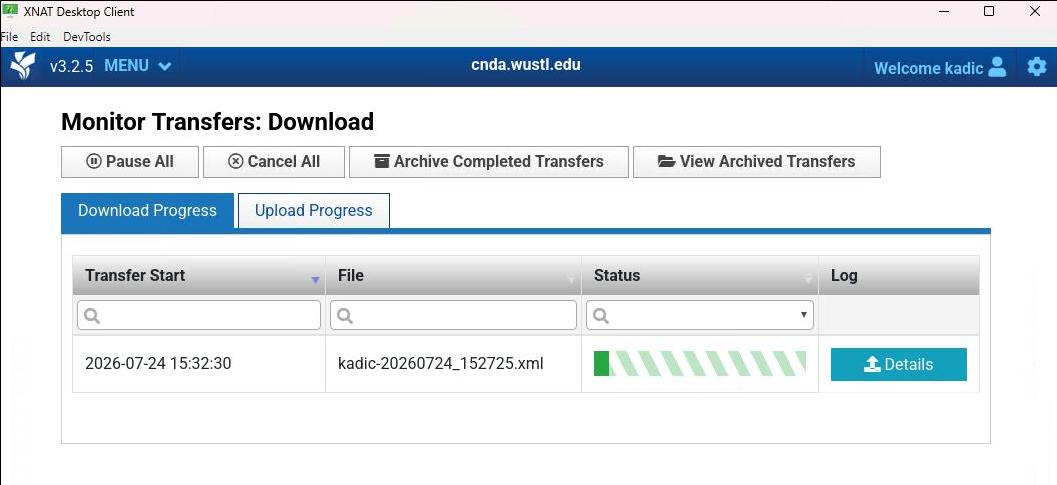
Click Details to see a full breakdown of the sessions included in your download.
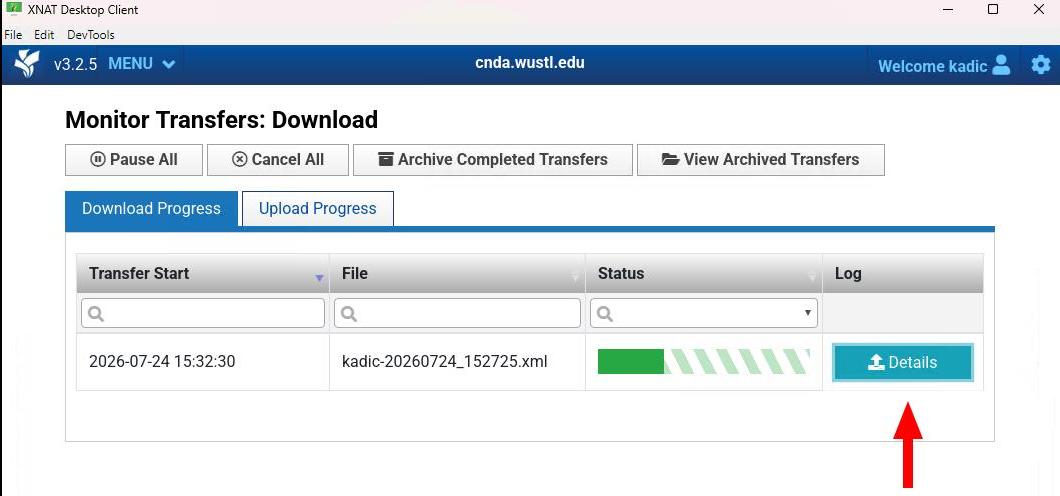
Note: It is possible for an error to occur while sessions are downloading. Seeing an error alone does not mean that all downloads have stopped. Check the Details page to see if downloads are still continuing.
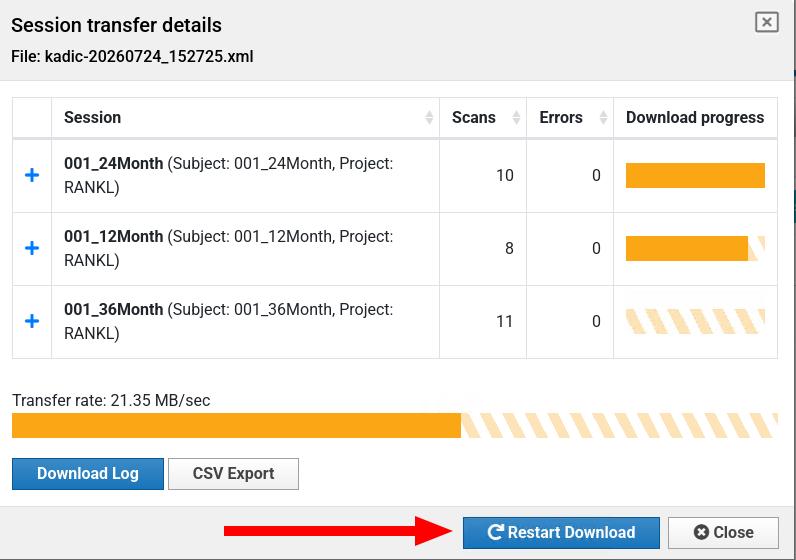
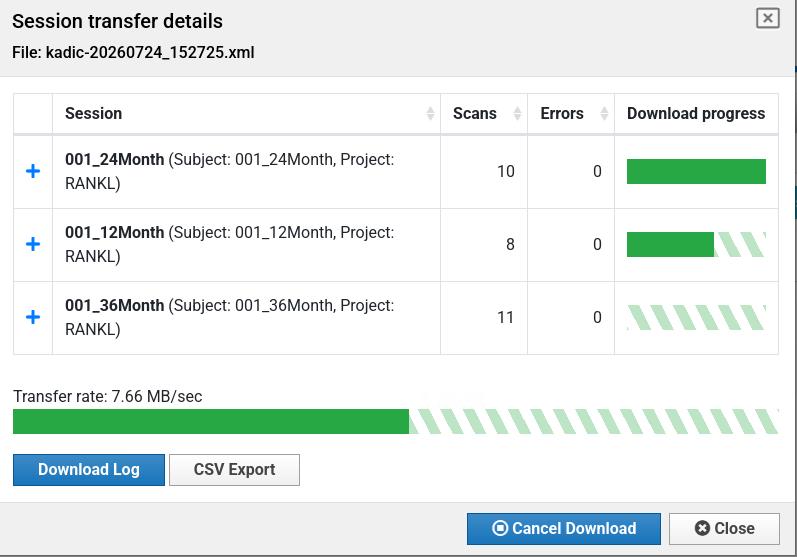
The Session transfer details window lists each session, its scan count, any errors, and its individual download progress. If a session's transfer is interrupted or paused, its progress bar will appear orange with diagonal stripes rather than solid. Click Restart Download to resume it. The Desktop Client will continue from where it left off rather than starting over.
Once resumed, the progress bar turns green and continues actively downloading, and the button changes to Cancel Download, confirming the transfer has restarted successfully.
You should find the downloaded file in your destination folder.
Important: Please monitor your downloads. Do not assume things are downloading for hours or days without checking.
Signing Back In to the Desktop Client
If you are ever signed out of CNDA, close the application, or lose your progress for any reason while a Desktop Client download is in progress, you do not need to start over.
Open the XNAT Desktop Client application again.
Click Add New XNAT Server.
For server address, type in https://cnda.wustl.edu
You will see fields for a username and password. Do not use your WUSTL Key or password here. CNDA requires an Alias Token and Secret to sign in to the Desktop Client:
- In the Username field, enter your Alias Token.
- In the Password field, enter your Secret.
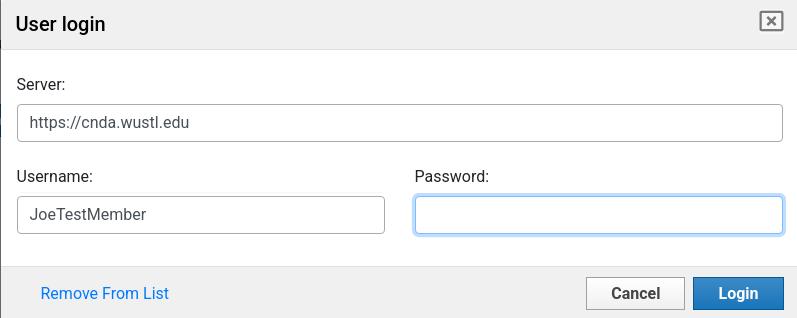
If you don't have an Alias Token yet, see Generate and Use an XNAT Alias Token.
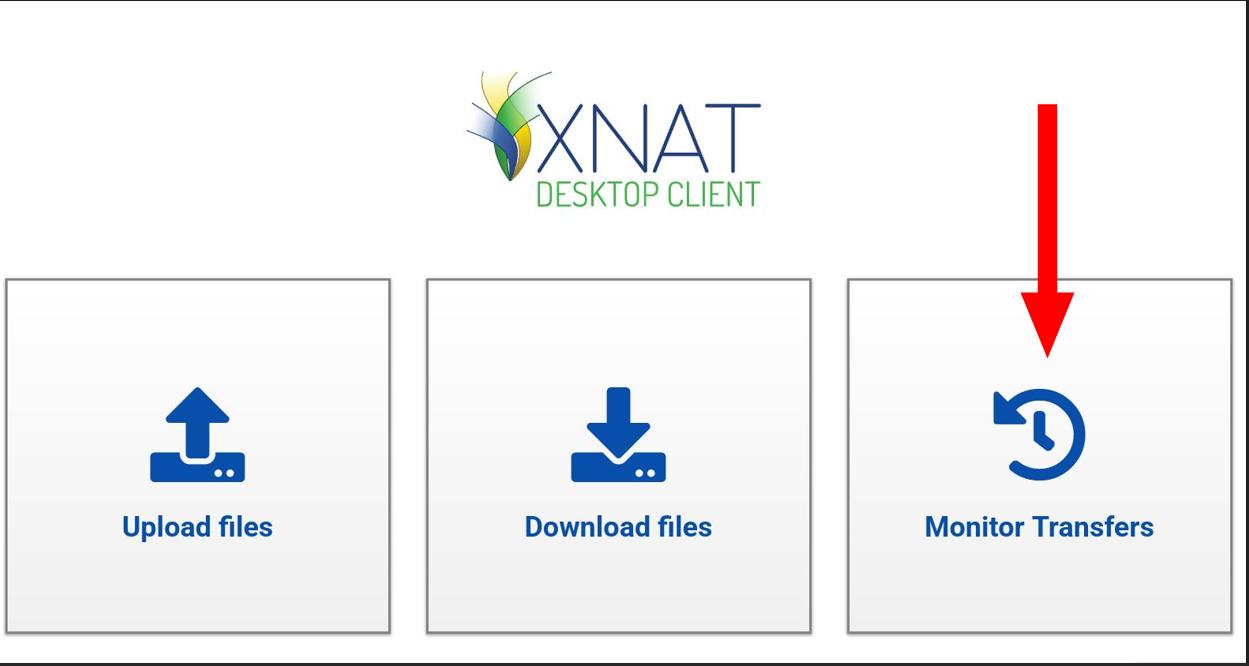
After login, click Monitor Transfers to return to the Download area.
Alias Token Expiration
Each Alias Token and Secret lasts 90 days. After that, it stops working and you will need to create a new one.
- If the Desktop Client suddenly fails to log in or reconnect, your token may have expired. Create a new Alias Token and Secret, then sign in again using the steps above.
- For large downloads that may take several days, check your token's expiration date before starting. If it expires soon, create a new token first.
Download via Script
- If you need to automate downloads of a lot of sessions or a whole project, another option is to see Downloading Sessions via Script.
- This method uses the XNAT REST API directly.
- API and script users will need an Alias Token and Secret instead of their WUSTL Key password, and the same 90-day expiration applies. See Generate and Use an XNAT Alias Token.